|
Fly of
the Month
Bob Ireton brings together his
experience in fly fishing, aquatic entomology, and knowledge of fly
tying techniques and materials, to design and tie durable and
effective flies.
|
|

Volume 6, Issue 11
November 2005
CADDIS EMERGER
Fly, Text, and Photography by Bob Ireton
I have been fortunate to meet and talk with Dave Whitlock on several
occasions. He is very personable, and extremely talented. I especially
like his series of ‘Red Fox Squirrel Hair’ flies. This caddis emerger is
from that series of flies.
The life cycle of the Caddis begins with the egg. This becomes the
larva, and fish begin feeding on the Caddis in this stage. There are
many fly imitations for this stage, such as the ‘Stick Bait’. The larva
then seal themselves in a protective case, and the larva transforms into
the pupa. When the pupa is ready to emerge, it cuts itself from the
pupal chamber, and makes its way to the surface to emerge as an adult.
The emerging Caddis is most vulnerable at this time, and fish,
especially trout, pursue, and eat many of these emergers. The ‘Caddis
Emerger’ fly works great at this time.
MATERIALS
Hook – TMC 2302, or equivalent.
Size – 14-20.
Thread – 8/0 Orange.
Weight – Lead or Lead-free wire same diameter as hook shank.
Rib – Fine gold tinsel.
Abdomen – Red fox squirrel belly hair and matching antron, mixed
50-50.
Thorax – Red fox squirrel back hair and matching antron, mixed
50-50.
Antennae/Legs – Brown Partridge hackle feather.
TYING STEPS - click on
pictures for larger view
|
1 – I am using a TMC 2302, size 14, for this fly. It has a nice ‘micro
barb’, and I leave it on. If you choose to mash it down, you may do so
at this time. Now place the hook properly in the vise, as pictured. Use
just enough pressure to hold the hook securely. Too much pressure will
damage the metal, and it may break under stress, like a nice fish!
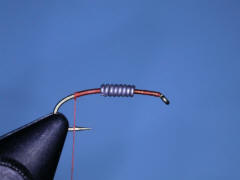
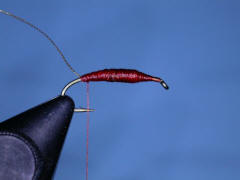
Attach the thread behind the hook eye, and lay on a good base rearward,
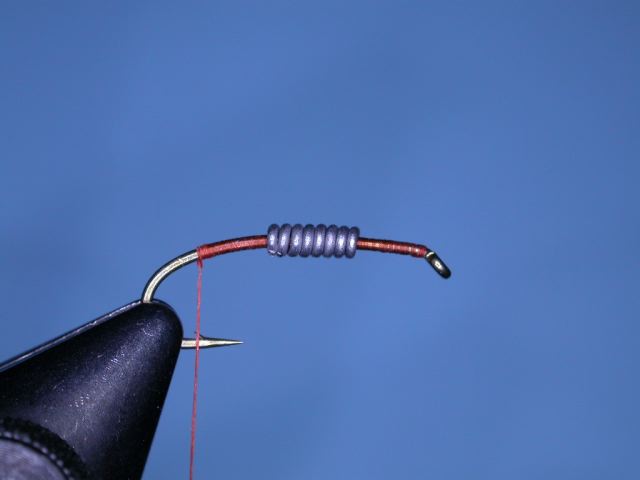
stopping above the barb. Tie a half hitch. Wind on the weight around the
center portion of the hook shank. |
 |
|
2 – Tie in the ribbing, then cover the weight with thread wraps, forming
a thread ramp on both ends of the lead. The dubbing will go on much
better if you do this. Leave the thread above the barb, and tie a half
hitch. Coat the thread wrapped body with Dave’s flexament |
 |
|
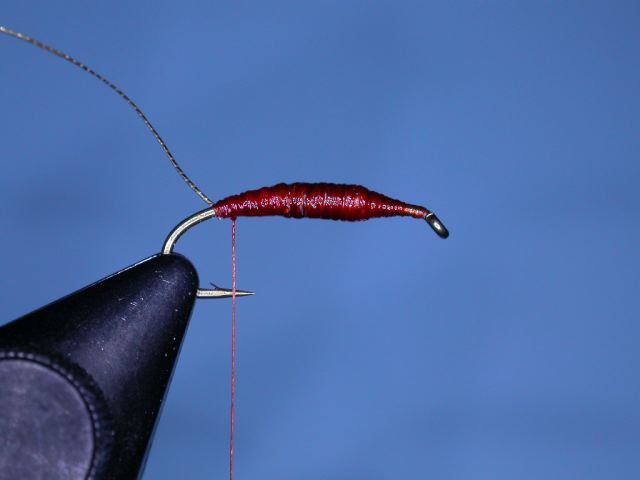
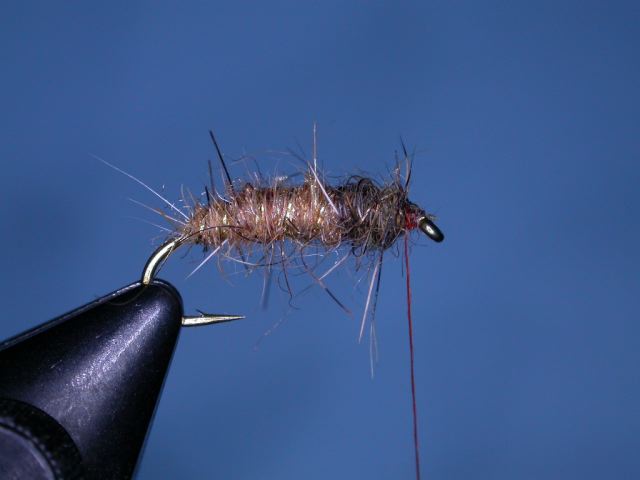
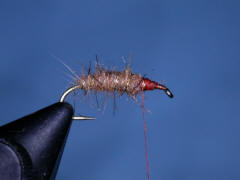
3 – Spin some of the abdomen dubbing mix on the thread, and form the
abdomen. The abdomen should be approximately 2/3 to 3/4 the hook shank.
Tie off, remove any excess dubbing, and tie a half hitch. |
 |
|
4 – Palmer the ribbing forward, leaving spaces between the wraps. Don’t
use so much ribbing as to overpower the abdomen. Have a look at the
picture. Tie off the ribbing, cut away the excess, and tie a half hitch. |
 |
|
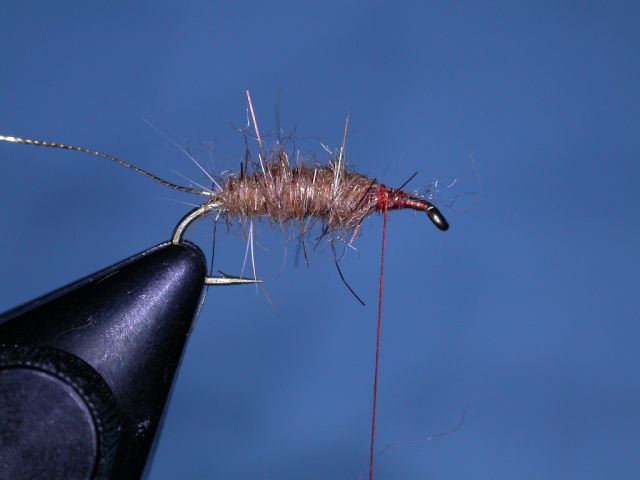
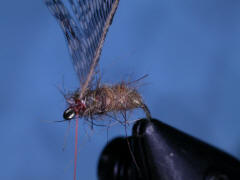
5 – Spin some thorax dubbing on the thread, and form a thorax. Leave
room for the hackle. Remove excess dubbing, tie off, and tie a half
hitch |
 |
|
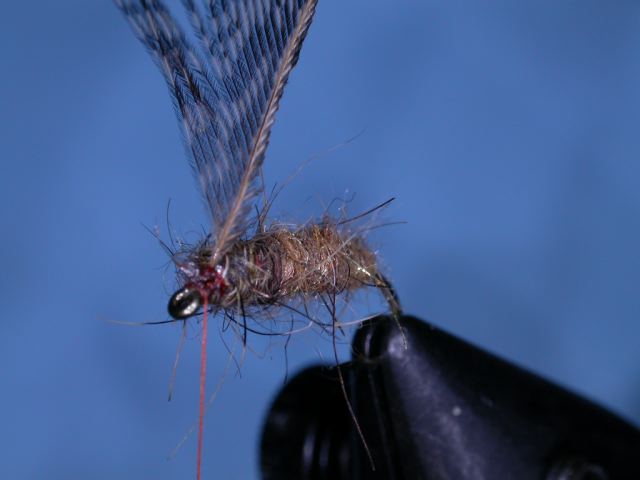
6 – Some folks seem to have trouble with the hackle feather. I have
seen, read about, and heard many views as how to attach the hackle
feather. Here is how I do it.
Since this is an emerger, the feather should be a little larger than
usual, to represent the antennae, legs, and wings of the caddis pupa. I
choose a feather with barbs slightly longer than the hook shaft. I cut
away the part of the feather with the fluff. I want the shiny, or convex
side of the barbs to be facing the eye of the hook.
I lay the feather over the hook eye, and as we want to palmer the
feather up and over the hook, away from us, I position the feather this
way. I then snip off all the barbs from the side of the feather shaft
that will be touching the hook as I palmer the feather around. I then
snip off several barbs from the other side of the base of the shaft, to
form a place to attach the feather to the shaft.
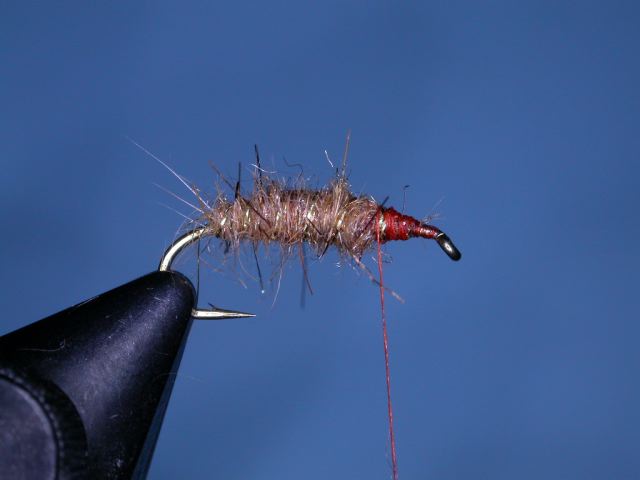
I now attach the hackle feather to the top of the hook adjacent to
the thorax dubbing so the trimmed side of the feather shaft will be
touching the hook as I palmer it around the hook. Tie a half hitch.
Sometimes I place a drop of head cement here to add strength. The
picture will show what the attached feather should look like. |
 |
|
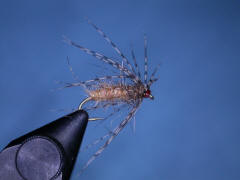
7 – Palmer the feather around the hook one full turn. This will be
enough feather barbs to imitate the legs, antennae, and wings. Tie off
the feather, and snip off the excess. Form a thread head, tie a couple
of half hitches, and then tie a whip finish. Cut off and remove the
working thread. Apply some head cement to the thread wraps. Pick out the
dubbing in the body. |
 |
© 2005 Robert R. Ireton, II
Page designed by
Panfalone@fuse.net
|